

Comments30Characters 1175Views3min55sRead

Migrating from MySQL to SQLite has become a popular strategy for lightweight WordPress blogs, staging sites, and small decoupled deployments aiming to minimize server overhead. However, because SQLite handles concurrency differently than MySQL’s default InnoDB storage engine, sudden traffic spikes or overlapping automated operations can trigger the common “Database is Locked” error (
SQLITE_BUSY).If your WordPress site running SQLite has gone offline, this troubleshooting guide will walk you through resolving concurrent lockouts, tuning database performance via common hosting control panels (aaPanel, cPanel, or CyberPanel), and securing your database from unauthorized public access.
The Root Cause: Understanding SQLite File-Level Locking
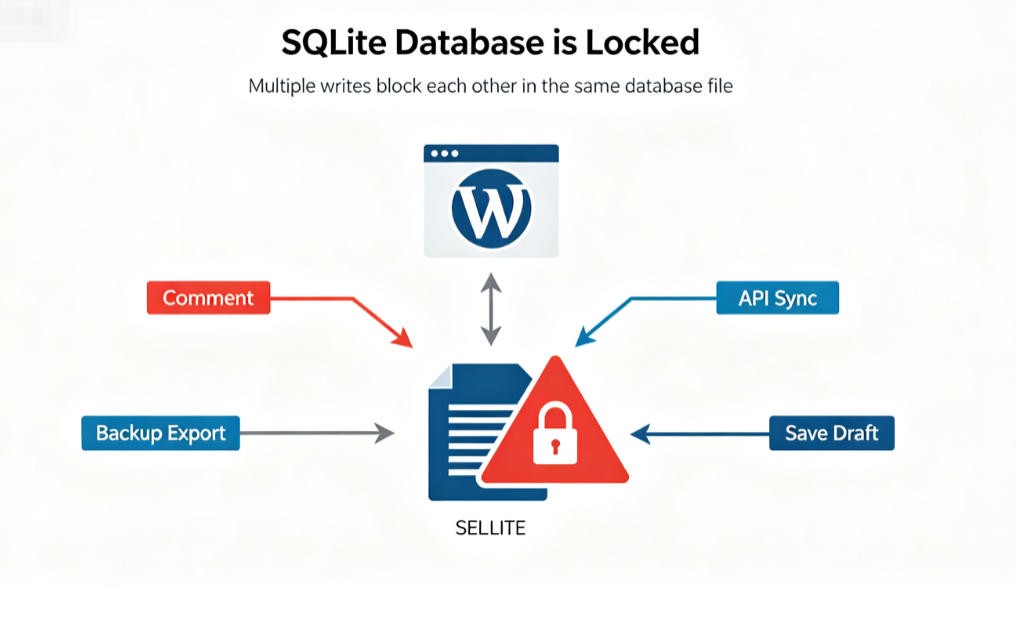
Unlike MySQL’s InnoDB engine, which supports row-level locking to handle high-concurrency writes, standard SQLite places an exclusive lock on the entire database file during any write operation.
When multiple write events trigger at the same time — for example, a visitor submits a comment, a translation plugin runs an API sync, and a backup plugin starts a scheduled export — multiple processes attempt to modify your
.sqlite file simultaneously. To prevent data corruption, SQLite rejects all overlapping write requests immediately, returning a “database is locked” error that persists until the active lock is released.Step 1: Enable Write-Ahead Logging (WAL) Mode via wp-config.php
By default, SQLite uses a rollback journal mode that blocks all read operations for the full duration of a write task. Switching to WAL (Write-Ahead Logging) drastically improves concurrency: reads and writes no longer block each other, and only concurrent write operations will conflict with one another.
Compatibility Note: The constants below are specific to the widely used SQLite Object Cache plugin. If you are using the official SQLite integration from the WordPress Performance Lab project (available as a built-in module in WordPress 6.4+) or another SQLite implementation, consult its documentation for the correct configuration values (e.g., some builds usedefine('SQLITE_JOURNAL_MODE', 'WAL')).
- Log into your hosting control panel (aaPanel / cPanel / RunCloud).
- Open File Manager and navigate to your WordPress root directory (typically
public_html). - Right-click the
wp-config.phpfile and select Edit. - Just above the line
/* That's all, stop editing! Happy publishing. */, add the following configuration constants:
php
/** Optimize SQLite concurrency and busy timeout */
define('WP_SQLITE_OBJECT_CACHE_JOURNAL_MODE', 'WAL');
define('WP_SQLITE_OBJECT_CACHE_TIMEOUT', 10000); // Unit: milliseconds (10-second total wait window)
Why this works:
- WAL Mode: Separates write logging from core database reads, so read requests are not blocked during active write operations. This is the single most impactful fix for most SQLite lock errors.
Note: With WAL enabled, your database directory will include
.sqlite-wal(write-ahead log) and.sqlite-shm(shared memory) files. Always include these files alongside your main database file when creating backups to ensure a complete restoration. - 10-second Busy Timeout: Extends SQLite’s built-in busy timeout window to 10 seconds. Instead of throwing an immediate lock error, SQLite will automatically retry the write request until the existing lock is released.
Step 2: Clear Stale Process Locks (PHP-FPM Restart)
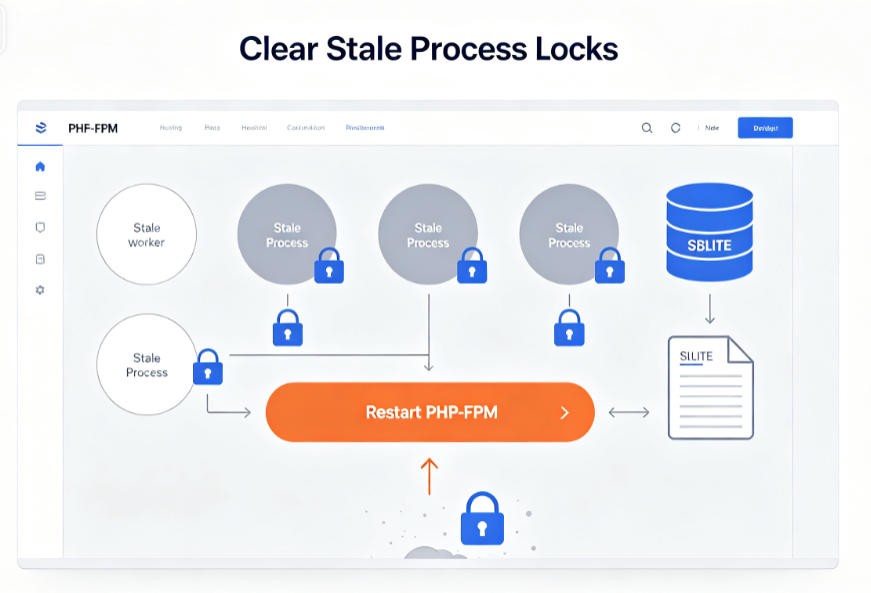
If your site remains inaccessible after enabling WAL mode, a hung or orphaned PHP-FPM worker process is likely holding an active file lock on your
.sqlite database handle. Restarting PHP will terminate these stale processes and release the stuck lock instantly.For aaPanel / CyberPanel / Custom VPS Control Panels:
- Navigate to the App Store or Software Manager in your dashboard.
- Locate your active PHP runtime version (e.g., PHP 8.2 / 8.3).
- Click Settings and open the Service tab.
- Click Restart. This terminates all lingering worker pools and releases stuck file handles immediately.
For cPanel (Shared/Reseller Hosting Environments):
- In the Software section of your cPanel homepage, click MultiPHP Manager or Select PHP Version.
- Temporarily switch your site’s PHP version (e.g., from PHP 8.2 to 8.3) and click Apply. This forces a full recycle of the PHP-FPM process pool to clear jammed background sessions.
- Switch back to your original PHP version and apply the change again to avoid compatibility issues with your themes and plugins.
Step 3: Resolve Post-Migration 404 Rewrite Errors
When migrating an existing WordPress site from MySQL to SQLite, your homepage typically loads normally, but all internal links return a hard 404 Not Found error. This happens because the rewrite rule cache does not migrate cleanly to SQLite — your permalink settings themselves remain intact.
To rebuild your URL rewrite rules without editing server configs manually:
- Log into your WordPress admin dashboard (
/wp-admin/). - Go to Settings > Permalinks.
- Scroll to the bottom of the page and click Save Changes.
- Important: Click Save Changes a second time. Consecutive saves bypass active object caching and ensure WordPress fully flushes and rebuilds its internal rewrite rule set in the SQLite database.
Step 4: Security Hardening: Block Direct Database File Downloads
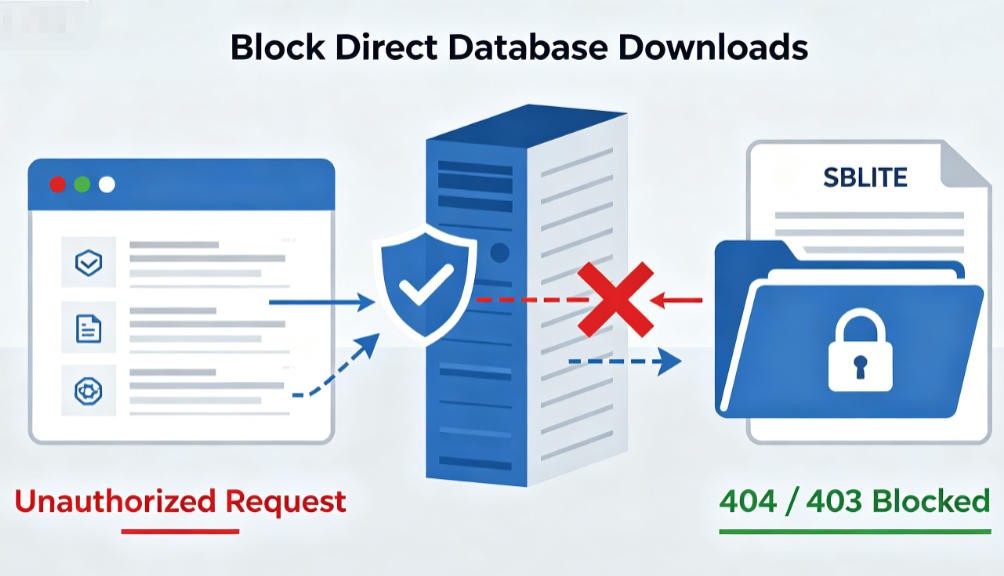
SQLite stores your entire site’s content, settings, and user credentials in a single flat file. Without proper server hardening, attackers who guess your database file path can download the full database directly via a browser, which poses a significant security risk.
Prevent unauthorized public access by adding the following server-level rules via your control panel:
If your server runs Nginx (aaPanel / CyberPanel):
- Open your site’s settings page and click Site Settings.
- Navigate to the URL Rewrite or Config tab.
- Paste the following location directive into your site configuration:
nginx
# Deny public access to SQLite database files (return 404 to hide file existence)
location ~* \.(sqlite|sqlite3|db)$ {
    return 404;
}
- Save the changes and click Reload Nginx.
If your server runs Apache / LiteSpeed (cPanel):
- Open File Manager, enable visibility for hidden files, and locate the
.htaccessfile in your WordPress root directory. - Edit the file and add the following rule block at the very top:
apache
# Block public access to SQLite database files
<FilesMatch "\.(sqlite|sqlite3|db)$">
    Require all denied
</FilesMatch>
Note: If your database filename starts with.ht(e.g.,.ht.sqlite), Apache blocks public access to these files by default — the rule above adds an extra layer of redundancy for full protection.
- Save and close the editor.
Post-Optimization Verification Checklist
Once you have completed all steps, confirm your fixes are working correctly with these checks:
- WAL Mode Verification: Trigger a write operation on your site first (e.g., approve a comment, save a draft post), then check your database directory for
.sqlite-waland.sqlite-shmfiles. Their presence confirms WAL mode is active. - Process Restart Verification: Confirm PHP-FPM has been fully restarted to clear all stale lock states.
- Permalink Validation: Browse deep-nested archives, posts, and category pages to confirm internal 404 errors are fully resolved.
- Security Access Test: Attempt to access your database file directly in an incognito browser window (e.g.,
shturl.cc/sdE9jVS6MNIEm6NLU0jp0RBkJZqRutKLvZmZ4qyJBCJ). The server must return a 403 Forbidden or 404 Not Found response to confirm access is blocked.
Final Note: Is SQLite the Right Fit for Your Site?
What Server Configuration (CPU, RAM, Bandwidth & OS) Should You Choose for a WordPress Site?
Many people build their websites with WordPress — whether for a corporate presence, e-commerce sto...
Best Free WordPress Slider Plugins 2026: 3 Top Alternatives to Paid Tools (Tested & Compared)
Last month, I took on a website project for a local cafe. The budget was tight, but the owner was cl...